Monday, December 16, 2013

Baby its cold outside!

Being from the south I know my idea of freezing cold is what most people would consider a cool day which is exactly why I prefer to layer up with a cardigan than wear a coat but this year things are feeling much colder than before.   As I posted in my previous blog I've recently taken up crocheting as a hobby and I'm really enjoying it.  Something about working with yarn just feels season appropriate and it helps that you can quickly whip out a blanket or scarf to help combat the shivers.  This weekend was no exception as I found myself shivering in the wind and a Joann's just a few minutes away ... it also didn't hurt that I had a coupon and they had yarn that screamed my name louder than anything I've ever seen before.  After watching a few tutorials on YouTube I set out to make my very own scoodie.   For those unaware scoodie are scarves with hoods and sometimes pockets/mittens. Why yes an all in one cold weather accessory that won't mess up your hair like a hat!

It took almost 3 skeins of yarn and about 5 hours to complete the whole thing and I am absolutely in love with the outcome!

Monday, December 2, 2013

Tis the season

Since Hanukkah happened super early this year I can go ahead and post the presents that have already been given, opened, and loved. I've previously posted the quilts I made for my nieces and the apron for my brother-in-law so here is the rest of it ...
A pot holder for my ma
if you look closely you can see the Celtic knot quilted into it
another pot holder for ma
a scarf crocheted for my grandma
another pot holder (i had binding issues with this one but hey all stripes are going in the same direction!)
a floor cushion, green lantern crocheted yarmulke, knitted scarf, and embroidered "teacher" bag for Josh and Bethany ...plus a tummy stuffer monkey cause it was cute

Hope everyone that celebrates Hanukkah has a great one! I'll be posting Christmas crafting over the next few weeks. Happy Holidays!!!

Monday, November 11, 2013

Almost time!

The holidays are coming way faster than I would like but isn't that the norm?!  My list of to-do has grown smaller and smaller which I am ever thankful for but until December comes I am not able to really post any of the projects I've been working on.  That being said I do know how long it has been since I've posted any thing at all so a small bit of spoiling is in order.

My brother-in-law requested an apron for the holidays and since he even drew up exactly what he wanted I see absolutely no harm in posting a picture of that ... though I did add some personal touches and flair to the apron that were not requested (I've got a problem with wanting little details in the things I make ... it is a good problem to have though.)
This was quite the learning experience for me because I've never really sewn on a machine with denim.  Sure I've made purses and water bottle holders from old jeans but that was when I was all about sewing by hand; connecting with what I was making and blooding my thumbs to the point of frustration simply because the sewing machine scared me.  At least I now know that denim and french seams do NOT splice!  But this did end up being the biggest apron I've made and I won't lie when I tried it on I totally felt like I was 3 again trying on my dad's coveralls.

Not only did I get some sewing done but I also taught myself a new craft.  For quite some time now I've wanted to learn how to crochet and since I was all sickly and snuggled up on the couch why not at least be productive?!  So I set out with the one crochet hook I some how ended up with and a thing of yarn I bought when I was all "I can knit with a loom" and went to town.  Armed with a book my grandmother gave that was published in 1978 a chain stitch was simple to learn but as you can imagine everything after that just didn't make a lick of sense to me.  Of course I was way too lazy to get on the YouTube to see if I could find a great tutorial for the super visual learner so I just wung it ... one day I'm going to realize that 9 times out of 10 that doesn't yield the best results.
 
But hey at least Gus enjoyed my sitting still for long periods of time though the yarn seemed to grab her interest more than my wishing she'd just sit down and keep me warm.  Now on the to-do list: learn to make a hat!  I have to say this crochet thing is probably the best craft learning experience because if you mess up or don't like what you make just a tug on the yarn makes the whole thing disappear and you've not wasted a single thing.

Tuesday, October 29, 2013

Playing dress up

I love costumes!  I'm one of those people that wears "costumes" on random Tuesdays just for fun ... blue gingham tank top check, red lip gloss check, white cardigan check, today I'm Dorothy! Because I've never lost my childish enthusiasm to play dress up Halloween has always been a favorite holiday of mine.

This year I decided to use my new found passion of machine sewing by making my very own costume.   Years before I would buy these poor fitting cheaply made things for way more than they were worth and let's just say that began to aggravate me.  As a kid all I would ever wear were costumes my ma would make: black kitty, princess, hillbilly, sock hop-er, and you get my drift.  So making the leap as an adult really wasn't that far for me.

The final result wasn't exact to the pattern,  some errors were discovered at the end of the night, and I rushed the overdress but I'm still rather proud of what I accomplished. Snow White has never looked so voluptuous!

Snow White with her bff Joan Holloway
Princess selfie

Monday, October 21, 2013

The first step is the hardest

Or at least that is what I am hoping for.  I've never been good with following patterns.   For the most part I see the general idea of the project and just wing it and for the most part I've failed miserably.   "Who needs interfacing, I mean really?  I bet I don't." Yeah there is a reason why patterns call for it, why there are different varieties of it, and if a pattern calls for it use it. 

Why I decided making a costume would be easier and cheaper than buying one I'll never know because in the long run it has been more expensive and time consuming than going to a store and grabbing something would have been.  That being said I know that this costume will last and if I happen to lose more weight (fingers crossed) I could alter this one to fit since I've made it and know how it was constructed.   Now here is to hoping I can finish the second part of it this week so I can wear it on Saturday!

Thankfully with my lack of experience with patterns and making clothing I was able to find a great tutorial online for the exact pattern I had bought. https://www.professorpincushion.com/professorpincushion/simplicity-1773-medieval-dress-series/ Seriously if it weren't for that YouTube video I don't know how I would have been able to finish the dress and it actually end up looking halfway decent. The dress alone came out decent enough I would wear it for more things than Snow White in the enchanted forest ... like Ice Skating Princess, expensive harlet from a beer tavern, lady kidnapped by pirates, Maria Antoinette post beheading, and I'm sure I could come up with more concepts. 

The dress
I decided to add some embroidery

Monday, October 14, 2013

Another one bites the dust

I've been busy, I promise.  Ok so maybe not 100% true but I've been doing stuff.  This past weekend I finished the quilt for Kara. It isn't perfect,  but really in a way that makes it perfectly handmade.  As the old wives tale about the humility block goes and what not. Some how there are pictures attached, I don't know where since I'm a phone blogger and I don't have all those lovely editing dohinkys but still I hope you enjoy! 

Handmade with love as always!

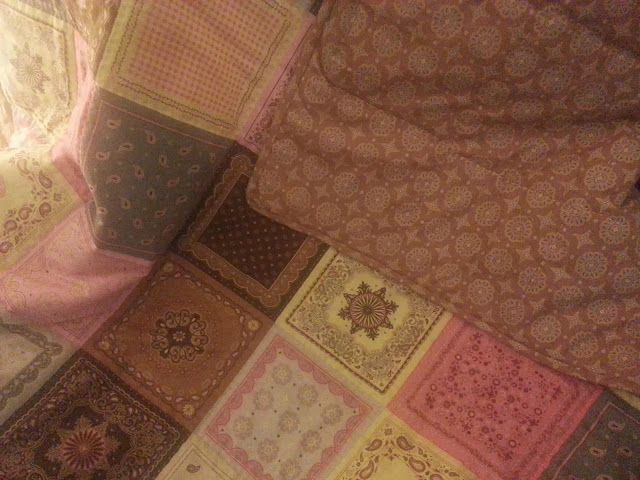
Quilt front: Saddle Up Bandana panel by Riley Blake

Quilt back: Saddle Up Medallion by Riley Blake

The back is my favorite print
Hand quilting detail

The quilt front

Friday, September 27, 2013

Work, work, work!

I've been buzzing all over the place like a  little worker bee recently.   The pile of projects continues to grow, unlike the hours in a day but c'est la vie!  For the past week I've done some sewing in the form of a denim apron for my brother-in-law which is 90% completed (I'm too scared to cut a split in it), a block of stacked coins made from all the orange fabric in my stash, and a small amount of embroidery.  

Other than that I've been working on a bit of the electronic side of the wonderful world of crafting.  I finally bought myself an inkjet printer which means I'll be able to print designs directly on fabric, which also means I need to begin learning design programs in hopes to create my own embroidery designs or be super lazy and just print then sew. 

Also thanks to the new printer I was able to download some new sewing patterns and actually spent last night putting one together in hopes to make my own Halloween costume.  I've tried following patterns before (purse) and didn't do so great as I basically said "I got this" and sewed things together without following directions ... lesson learned as it still sits unfinished in my craft room.  But I'm planning on doing better this time around as the idea of looking like someone from Once Upon a Time that just stepped out of the enchanted forest  sounds delightful! Hopefully I'll get the first part finished soon so I can check the fit before finishing the costume up ... I should diy a dress form one of these days but with an ever changing body size I'd hate to make one then gain or lose weight.  Oy the life of a crafter and the desire to make everything with your own hands!

Thursday, September 19, 2013

The nerd in me

A dear friend of mine is one of those people who is very passionate about history,  we are talking does reenactments usually a few times a year.  He collects historical artifacts, studies for fun, makes historical facial hair look cool, and can talk so enthusiastically about history it gets other people excited about it.  His vast knowledge is astounding and it is always a great pleasure for me when we get into discussions about Europe in the 1500's (I adore the Tudor dynasty.)

It may seem a little odd for me to talk of such things in a craft blog but there is a very good reason ... he has asked me to make a historically accurate quilt for him!  The amount of work it is going to take does seem a little daunting but in the face of difficulty I tend to develop an almost inhuman amount of determination. This is just a very exciting opportunity for me!  Not only do I get to share my passion for quilting with a friend but I also get to let my inner nerd out to play.  The research has begun for both of us, as we both want to make something accurate to time, trying to find patterns and fabrics that do not jeopardize the integrity of a reproduction. 

I'll be meeting up with him tomorrow in hopes to brainstorm further about what he wants and maybe I can talk him into doing one of those pretty Turkish red and white quilts I keep coming across in my research.  Like quilting has been since I started almost 2 years ago this shall be a giant learning experience for me and I'm completely thrilled about it.

Friday, September 13, 2013

Birthday!

As mentioned earlier I haven't had much time nor real ability to make anything more to sell on etsy but I have been working on gifts for people.   Yesterday was a dear friend's birthday and so I made her a little something for her special day.  Like me she has a fondness for blue (ice blue being her favorite) and a first name that begins with S so making her present was one of the easiet things for me to do.  The entire process was a breeze and took very little thought because instinctually I knew what to do because it was pleasing to my eye  instead of being caught up in what others might think looked good ... it pays to have friends with similar taste (especially when they clean out their closets ;)).  So though I was all "I wanna keep it" I was able to part with the little pillow and seeing her smile when she opened it was well worth the time it took to sew it. 

Happy Birthday Shana! You have one of the brightest and sweetest hearts and are a great friend. Many blessings and wishes to you, my dear friend!

Tuesday, September 10, 2013

Set backs

I knew trying to find balance was going to take some effort but I never expected it would be this difficult!  Work, home, family, friends, holidays, crafts, and trying to have some what of a dating life is a juggling act to say the least.  The things I've managed to work on in the past week have been in preparation for the holiday season and due my bursa being inflamed it hasn't been much. Because of that I don't have a single craft to post about here and that is disheartening.  On top of all of that I now have to find time outside of work to post blogs with pictures due to blogger's recent update and the very old version of IE on my work computer not recognizing it.  If it doesn't kill you it will make you stronger so in the words of Annie you can "bet your bottom dollar" I'll find a way to make all of this work and hopefully soon.

Monday, August 26, 2013

Open For Business!

Yesterday I finally added things to be purcahsed on my Etsy account!  Three whole pillow cases completed with hand embroidery have been posted for sale and hopefully at some point I'll figure out how to post a button on this blog that will auto-link to my Etsy shop ... but until then CLICK HERE!!!!!!!   I've got a few other projects in the work to add within the week that I hope you guys will like.  But without further ado here are the real stars ...

The Cameo Pillow fits a 16x16 or 18x18 pillow form. (shown with 16/16 form)  It is hand embroidered with Ecru and a very pale Pink on a black cotton blend fabric.  Pillow insert pocket is embellished with Ecru embroidery. Sold for $20.
The Flower Pillow fits a 10x10 or 12x12 pillow form. (shown with 12x12 form) It is hand embroidered with a bright pink and includes decorative cream buttons on a black cotton blend fabric.  Pillow insert pocket is embellished with bright pink embroidery. Sold for $18.


not sure why the pic of the back looks lighter than the front, they are the same color I swear
 The Celtic Knot Pillow fits a 10x10 or 12x12 pillow form. (shown with a 12x12 form) It is hand embroidered with silver on a purple cotton blend fabric. Pillow insert pocket is embellished with silver embroidery. Sold for $18.

In the works currently are some pieced projects ...

Chevron, Deconstructed 9 patch, and simple block rows.  I've not yet decided if I want to add the chevron and 9 patch together in some way or if I want to make those into seperate things all together ... but seriously look, all the stripes are going in the same direction, my points are pretty, and once I ironed the 9 patch it laid flat and looked much better.

That is all of the sewing I did this weekend but no worries I've got a few other things up my sleeves and ready to be unveiled in the very new future.  Check back in a few days for even more craftiness!

Tuesday, August 20, 2013

Poetry in Motion

This past weekend I went to visit my family in Nashville and as my ma was cleaning up from the delicious brunch she prepared she looked directly at me and said "If anyone wants to know what I want for the holidays it is pot holders" as she waved a burnt one in the air.  My ma, the main reason I think present should be not only thoughtful but also useful.  I've never made a pot holder, I'm still new to sewing but it seemed simple enough ... like mini quilts.  So last night I sat down at my sewing machine in hopes to come up with a design that was not only beautiful but also practical.  In turn I ended up with two practice pot holders before my sewing machine once again decided it hated me ... having a machine make a horrible noise after sewing only for a few hours after every time you get it repaired makes it extremely hard to save money in order to purchase a better sewing machine.  But I digress.  Both practice pot holders were very similar, minus the quilting, and the third I was in the middle of before the grinding noise and the massive knot ball that the bobbin made started I was going to try something else all together ... sadly it will be a while before I am able to see if that prototype is good.  The two that I completed aren't good, in fact I need some serious practice on my binding via machine largely due to corners but for a first time go at it I don't think they are too horrible, I mean if an elementary student made them that is.
The yellow was my first and it is by far the saddest looking thing up close because the binding is way too big and the corners on the binding are all bunched up and super thick and just not good.  The blue one I did a much better job on because the fabric wasn't nearly as thick and the binding I made a half inch smaller but the corners again are bunched up and it just isn't perfect ... we are our own worst critics.  But needless to say I do adore how the quilting on the blue one turned out, especially since that was my first attempt at machine quilting.

And this is exactly why the internet is the crafter's best friend ... next time I decide "I can do that" I should probably google "how to" before I just sit down and decide to wing it!

At least with my sewing machine once again being broken I have plenty of time to spend embroidering and coming up with new designs in hopes to finally put something up for sale on my Etsy page.  Thankfully I have plenty of embroidery floss to go through and organize and sew with.

It truly is amazing what you can find in a giant box of fabric and thread from the Thrift Store that only cost $2.50!  There are over 50 colors of floss to choose from ... what would you make with such variety?

Tuesday, August 13, 2013

Freestyle sewing

This past weekend I finally got my sewing machine back and of course the creative bug had grown to Godzilla size in the week I was sans machine.  So aside from binding the quilt that I posted about yesterday I decided to do some freestyle sewing.  When making quilts and well anything that requires piecing for that matter "measure twice, cut once" is a lifestyle, a mantra to live by, and some times all that precise-ness can be draining.  It isn't often that I just sit down and make something these days without thinking about it for weeks in advance, figuring up all the math and knowing exactly each step to take 12 steps before I have to take it.  As someone that tried every creative path out there before discovering quilting and embroidery I completely enjoy just creating for the sake of creating, to know that out of a pile of what looks useless I make something (hopefully) beautiful.  This weekend was no exception.
Not a single piece of fabric was measured, everything was just eyeballed before I sat down to just wing it.  It isn't perfect, it isn't fit for a price tag, but I made it for me and the quilt dubbed "MINE."  When I sat down over a year ago to draw up "MINE" I used my trusty highlighter to color and absolutely fell in love with the blue highlighter look.  I adore bold and bright colors, wearing things like the cardigan that my friends call "caution yellow," so the fact that I went on a search for the perfect "highlighter blue" fabric for my own quilt should not be surprising at all.  Fabric.com saved the day, as usual, allowing me to select swatches of several fabrics to be sent to me in hopes to find that majestic highlighter blue.  Kona Cotton Peacock was the most perfect match and seeing that square of fabric made my heart leap with joy and a giggle to escape my lips so I proceeded to get online and order a few yards ... amongst the other fabric I ordered.  A few weeks ago I finished up the quilt front of "MINE" and there was that square of fabric, the small piece of fabric that made my vision come true, so of course the only way I was going to be happy was by slicing that square up with my rotary cutter.  Within an hour all of the swatch was cut and sewn with scraps of white from "MINE" and a splash of yellow from a table cloth I've had since I was a pre-teen and turned into ...


It's not perfect but it sure is adorable and I think it will look absolutely beautiful once I finish "MINE" and can put it all together on my bed.  What would you make if all you had to do was create for the sake of creating?

Monday, August 12, 2013

binding isn't always painful - the tutorial


You've finished the quilting on a lovely new quilt and you are just one step away from having a completed snuggly blanket ... binding.  When it comes to binding it is that last little touch you can add to give a quilt a pop of color if you so choose to.  So here we go ...

* First steps first: you have to do some math, it is simple so there shouldn't be any fear.  All you have to do is add up the length and width all around your quilt, meaning if you have a quilt that is 44"x48" the number you will get is 184 (44+44+48+48= 184).  You take that number and add 10, making the final number 194. 

* Second step:  measure and cut out enough strips of fabric 2.5" wide for a total of at least however long your math on the above step told you (ex: 194").


* Third step: attach the strips together ...

pin two strips together just like this
sew from the top corner to the bottom corner
like this
cut off the extra fabric leaving 1/4" seam allowance
* Fourth step: Once all of your strips are sewn together it is time to iron.

press seams open

fold binding in half and press
nubbins ...oops
Remove the nubbins from where your strips were connected
* Fifth step: Back to the sewing machine!
Pin binding with the rough edges lining up with the rough edges of the quilt
leaving a tail of 6 inches above the pin that you will not sew
as shown
sew all the way down to the corner of your quilt 1/4" away from the edge

once you are 1/4" away from the edge of the quilt, with your needle lowered,
lift the sewing foot and rotate your quilt as shown

with the foot up you will aline the binding along the new side, rough edges together,
pinching the binding in the corner and folding the excess upwards.
begin sewing down the new side and repeat steps until ...

you come 10 inches away from where you began sewing on the binding
back stitch a few times before removing from your sewing machine

* Sixth step: (I forgot to take photos I'm sorry) With your two tails shown in the above picture you are going to mark where they line up with each other.  Due to this being the end of the binding you don't have to sew on an angle, a straight line is more than fine.  You are going to open the binding (since it is folded in half prior to sewing) and with the front of the fabric facing each other you will sew the pieces together on the marks you made when you lined them up.  Trim off the excess fabric leaving a 1/4" seam allowance.  Sew the rest of the binding to the quilt. (If you have any questions please feel free to contact me)

* Seventh step: Hand sewing!

you will fold the binding over the rough edge of the quilt,
with your needle and thread you are going to go through just the top layer of fabric
bury the knot of your thread by tugging gently until you hear a "pop"
(this technique is used when hand quilting as well)
see there isn't a knot showing
 
you will take your needle and insert it through the fold of the binding that you pressed

with your needle still in the binding you will insert the needle through only the top layer of fabric on the quilt
as shown
and then back through the fold of the binding
continuing all the way to the corner of your quilt

see how pretty the blind stitches are on the binding
 
you will then fold down the unsewn binding to match up with the sewn section
take your needle and insert it through the new side of binding
as shown

you going to sew the corner a few times
ensuring you have securely attached both sides of the binding to the quilt
and then continue these steps until the binding is completed
 * Eighth step: Admire, snuggle, take a nap!