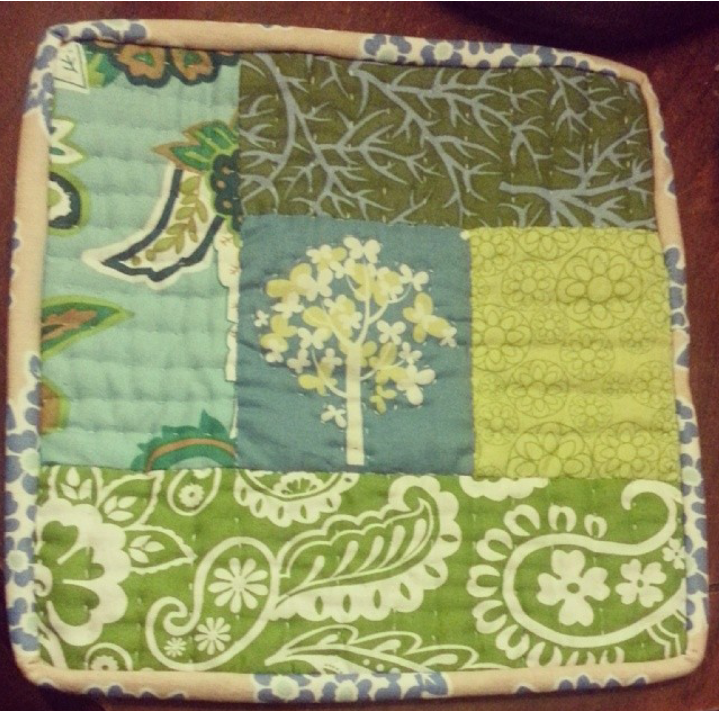
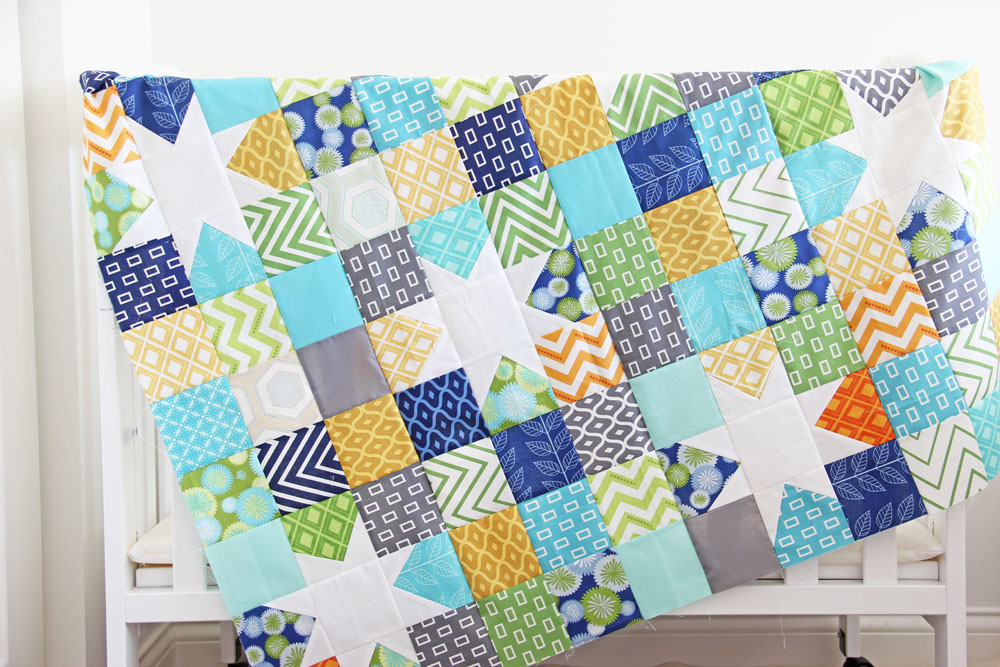
I have been using a personal blog to post craft things but decided to start a separate blog all together focusing just on my handy work. Since this is my very first blog I'm just going to throw all of my previous blog posts in a most awful and unorganized fashion, for that I apologize and promise future posts will be better. The crafts are all sorts of things I've found online either as inspiration or free tutorials or even from books I've been given as gifts and some are 100% my creations. If you have any questions about any of the items below or are interested in purchasing/making your own please feel free to contact me here via comment. I will be setting up an email address and hopefully a page to sale items in the very near future and will update this blog once that has occurred. Hope you enjoy and welcome to my new craft blog!
Now here is a tornado of crafts shown in order of oldest to newest projects:
Anywho, as mentioned above here are the final holiday crafting pictures. I did debate on doing step by step pics and then post a tutorial but I decided I'd be lazy and not ... but if anyone wants to know how I did anything you, as always, are free to contact me.
All seams double stitched with a lock loop stitch to secure the seams and, of course, a pillow inserted.
the design ended up slightly crooked but for my first ever piece I think I did a great job
*pats back*
first of the flowers and the wooden vase I ended up choosing
natural elements on the paper and wood everywhere else
minus the button centers
All the flowers! Ended up with two 4 petal and one 6 petal flower
6 petals are the easiest (just gotta do 2 at a time)
the blanket for S&S ... y'all didn't think the design would have been this pretty did ya?
EVERYTHING! That brown guy at the bottom is the floor cushion I made
and I just realized everything is floral minus the cushion
I believe this is the best present I made

Even though I'm still desperately in need of a full day off everything that I put energy into these past few weeks was accomplished, goals reached, and deadlines met. I have absolutely no clue whatsoever how to get from Nashville to New Harmony, IN even though I have now traveled to and from there. On the way up I was sewing stopping only to eat lunch and then when we arrived I stopped again only to unload the car of my stuff. I knew that by 6 I had to be at the park to do the rehearsal and much like the actual quilting I left no wiggle room in the schedule. At 5:15 I tied the final knot, changed quickly into a skirt, took a picture of the quilt, folded it up nicely, put it back into it's box, and ran out the door.
The binding I premade in March was JUST long enough
4 inches needed to be cut off which is kinda viewed as not enough in the quilting world
the embroidered pieces I did prior to appliqueing them onto the quilt front many many moons ago
these are the 4 secret presents mentioned previously
I hurt myself last night and didn't even feel it; I'm chalking up the not feeling it on how sharp my rotary cutter is and not how numb my hands actually are though so there is that. An inch long perfectly straight slice on that fleshy part just below your thumb on the outside of your hand ... yeah that spot where you can see all those tiny little veins just under the surface. Another price I had to pay to the crafting gods I guess. It looked fine right after I did it, my rotary cutter slicing perfectly through fabric until it hit something hard (my hand), I removed the blade from my skin and thought "tis only a flesh wound" and continued on with the pillow making process, and a minute later I looked down to see my bloody hand about to get blood on my fabric. The surprising part (ok maybe not so surprising) is that I was more concerned with the fabric than I was with my bloody hand ... priorities I has them lol. I wrapped a nice thick layer of toilet paper around my hand, moving it and refolding it as my hand soaked it red, and continued on with my crafting. (why yes I'm a crafting badass) Almost an hour later the bleeding slowed to a small trickle and became the perfect wound to apply a bandaid to, therefore I could finish the pillow without fearing the possibility of staining it with my leaking hand. (don't fuck with rotary blades man they will fuck you up if you do ... but now I have a new weapon for the zombie apocalypse!)

I pieced the back ... that middle section is what I sliced myself on
I've got to get better at my front piecing
Now it wasn't until I was working on Beckye's name that I realized the number of leaves leading up to the name actually is how many children those names have ... creepy I know. The extra creepy part is Nat has 3 leaves which also is the number of children who have died in the family. When I was starting dad's name I at first only had one leaf and seriously talked to myself for a few minutes over how weird it looked despite there only being room for one and so I adjusted the S and added another leaf ... dad technically only has one blood child also creepy I might add. (cowinkydinks I think not ... I could say a greater force was there with me but why didn't they stop me for slicing my hand open?!)
all stuffed with fluff
whatcha think of Mr. Owl as a pillow?
(my piecing wasn't the best but hey I made it all by myself!)
My poor poor thumbs and index finger on my right hand are all bruised and tender, old wounds reopened even. Quiltathons are not all that pleasurable but damn it sure is awesome to be like "in 19 hours of work I finished a quilt." That's right in just 19 hours fabric was purchased, cut, pieced, sandwiched, hand quilted, and bound ... I'm still batshit crazy for attempting it even if I did succeed. Friday night I ended up going over to my sister's house to babysit my nieces, I of course brought all of my stuff with me to work on the quilt while there. Those that have met my nieces or have little ones of your own are probably thinking I didn't get any work done but to be honest I got a lot done with them there. The oldest one, Kara, was amazed at what I was doing and of course wanted me to teach her how as well as make her one with fairies. The youngest, Lilah, though was all "I don't want a blanket" while she snuggled my legs under the floor stand as I quilted. I always love babysitting my nieces because they are always the most perfectly behaved little girls in the world and if they even begin to "break the rules" a simple look or a "now I thought you were told not to do that" is all it takes for them to get all ship shape. (to be rather honest most kids have reacted that way to me except my cousin Benjamin who always needed to be wrestled just to do a simple task like "don't beat up your sister" ... good thing he went into the military) Anyways, at 11:53 am (see still morning lol) I finished the binding, snapped some pictures, put on clothes, threw the blanket in a bag, ran out the door, drove to the girls house, and sat for the first time in days it felt like ... after quilting until almost 4 in the morning and waking up a little before 8 I was pooped to say the least.

look at the bottom ... the binding lined up with front
I almost had a hissy fit but left it anyways
you can see the pieced binding better on the back
each side had 3 fabrics used on the front added into the binding
Daddy's apron ... I even attempted to waterproof it (I'll let ya know how that works out)
Granny Doot's fake quilt top ... 43x63
the amount of hand quilting finished by Sunday afternoon
how I entertained myself while quilting
the top isn't laying flat because I added room for boobs
So after a night of preparing to craft I crawl into bed knowing the morning will be coming quickly and crafting of a different kind will begin. Told you guys I'd end up crafting all weekend ... though it totally didn't end up exactly as I had planned. After Sunday Morning went off the air I went to the craft room and began sewing and ironing away ... french seams anyone? During the trip to Hobby Lobby the day before I decided that instead of folding, pressing, folding, pressing, and finally sewing as the way to hide the raw end of Crysti and ma's aprons that ribbon, beautiful ribbon, would be much easier and less time consuming. Well not only was I right but I happen to think the final outcome with ma's apron is down right adorable. Whatcha guys think?
granted it is tied around a door and stretched but it is still cute right?!
Well I did it and way before deadline! That is right my fourth quilt has been completed! Totally didn't expect that to be the case nor did I expect that to happen and me still have time to do my other obligations but as of 5 last night I was completely done! And here it is ... Ada's Carnival!
 |
| 4200 square inches of color |
 |
| close up |
 |
| the back |
 |
6 rainbows in total were quilted
ps look at those stitches! |
As you can tell from the rainbow pic I still have some markings that need to be washed off but other than that I'm through with the whole damn thing! Something that started over a year ago is now complete and though this whole quilt has gone through many different designs and many moments of changing my mind completely I have to admit I absolutely adore the final results.
The journey of a quilt
 |
| decide you want to do a rainbow quilt |
 |
| buy tons of fabric |
 |
| add some flare |
 |
personalize it
hide your initials |
 |
get super excited when you achieve a perfect point
aka sew everything together |
And as you can tell between coming up with the layout and piecing everything together there was a change to the design but that is what happens when you ask the person you are making it for if they have any input ... also the size changed dramatically from 7200 square inches to 4200. Though it isn't nearly as large as I originally planned nor as large as they wished it would be it is the perfect size for single snuggling or a foot runner for a queen or king sized bed. Aka damn near 5 feet x 6 feet.
I have a passion and it drives me to do things I did not know I was capable of. For years, hell almost two decades, I've had this urge to create. There has been many, and I mean MANY, attempts at a wide variety of crafts over the years. There was that month I thought I'd be throwing pottery as a living where I made clay faces of my ma and sister and I made that ashtray that I still have some where. The many different purses I've hand sewn. The remaking skirts into shirts or reshaping oversized shirts to fit me. The painting. The oil pastels. The drawing. The glass painting. You name it I've probably tried it and not once did I ever find a happy place, not once did it relax me. Quilting and embroidery are the only crafts I've found in my almost 20 year search where I can honestly just zone out and relax. Sure there are moments of stress and freaking out that occurs with these things just as there are with any craft simply because "it's not perfect" but I've found those moments few and far between. So what if my seams aren't perfect or my points aren't exact because in the end those things do not matter at all. Things I started out thinking have pretty much been completed replaced by "eh fuck it" thanks to the HUGE learning lesson that Monkey Love was simply because I chose one of the hardest designs to start out quilting ... damn hexagons. But with finding something that just feels right comes negatives too, such as not sleeping much last night because I couldn't stop thinking about what my next project will be. Who cares that I already have a quilt designed and fabric purchased for it when there isn't a definite one lined up behind it! Seriously, these are the things I think about these days in the stillness of night. So here I am sitting at my desk with highlighters and graph paper knowing I will come up with something for the fabric I got at Ada's and I know that I will find additional fabric to go along with it to make the most perfect retro country quilt of all time.
 |
| yes you shall be the Beyonce of quilts |
I'm thinking it shall be one of two designs and I'm heavily leaning towards one in particular. After piecing 3 different quilt tops I do know that basic squares are the easiest things ever and the results can actually be quite beautiful but that just feels like an easy go to when you just want to throw something together without any real thought. Ok fine so even those require some serious thought about placement and that sounds easier than it really is simply because for me I like laying the fabric out and making a mock quilt on the floor before even sewing. But even with that it just doesn't feel like enough for those fabrics because I truly want them to POP in a way that makes people as excited about them as I am. So here are the two concepts running in my mind at this time ... of course things may change (as they always do) but brainstorming is always fun.


I stayed up late on Wednesday simply because I knew I would have the 4th off. I spent the night sitting there staring at my phone trying to find the words, the courage, to initiate conversation while Grey's played on the tv. Just before midnight I was on the receiving end of contact from the person I longed to talk to and an hour passed in the blink of an eye. Happily I crawled into bed a little after 1, smiling ear to ear, and I woke just over 8 hours later to them yet again just wanting to say hello. Feeling this overwhelming wash over me that I wasn't alone in my love I went out into the day with every intention of enjoying myself to the fullest. Why yes that included a creme filled donut and iced coffee, duh! Though I slept way later than I have in a long time (9:43) I completed more in that slightly under 12 hours than I have in multiple days recently. Laundry, ironing, folding, measuring, cutting, and sewing were done. Why yes I completed my very next quilt top and it is MINE! In fact it is so mine that it's name just might end up being MINE!

I still absolutely adore the design, adore that there is an SS on it, adore that it isn't typical, and adore how massive it is! In no way did I think that I would already be done with this step so quickly after finishing the last quilt but life rarely goes as planned. Now comes the task of piecing together the back, getting batting, and deciding exactly what color thread I want to quilt with.
 |
| the dots will be a stripe on the back |
I'm thinking a nice dark brown thread or a pale blue or even a moss or maybe all three for the quilting ... like do the blue and green on the blue portions and the brown on the white. Or even just do a white on the blue and a blue on the white. Pretty much already have decided I'm just going to follow along the pattern of the piecing in regards to quilt lines maybe spaced out every 2 inches. Something like ....
 |
| now if only quilting would be as easy as using paint to draw lines |
Of course most people probably spent their 4th drinking and socializing but not me. Though I absolutely do not mind that I got to spend the day doing what I love I did not enjoy being asked if I were going to a party I was not invited to. Add further insult to injury was them trying to convince me to just show up almost 2 hours after they let the cat out of the bag that there was a party and then the host finally getting in touch with me after 8 with a "you coming?" At that point I hadn't showered and frankly after 2 weeks of not talking to the host despite my attempts to be like "hey I've got something important I would like to talk with you about" I said no and soon there after crawled into bed completely forgetting that I needed to pack for my weekend trip. But needless to say I celebrated the nation's birthday by making it in the USA and though it is just for me and I'm not selling it I still think that counts! Plus it is like historical in some ways, quilting, and is a much better homage than blowing things up and acting like a drunken fool.
I had a plan last night. I was going to go to the grocery store and then head home to do massive amounts of cleaning since I'll be babysitting this weekend. Unfortunately, at 3:20 yesterday afternoon I got hit with a pretty bad vertigo attack and ended up spending the next hour pushing myself to not fall out in the floor because the last hour of work is half a mile of walking and doing paperwork. So when my ears finally decided to not make the world spin it was after I had already made it home which meant I didn't go to the store and you'd think I would have decided to bust ass on the cleaning but watching Grey's totally sounded more fun. Due to all of that I will totally have to do everything tonight because I'm completely out of breakfast, completely out of coffee at work, completely out of creamer for work, and completely out of face wash. At least I did fold all of the clothes that were on my couch under a blanket for over a week and I picked up all of the fabric scraps that were on the floor from the spur of the moment quilt making. Of course when you are picking up your quilt supplies you begin to think of what is next and if you are anything like me you get completely side tracked to the point of feeling asperger-y.

And there you have all the fabrics that I am thus far going to be using for the next quilt that requires piecing, my country quilt. Of course I totally found other things when I was putting up some stuff and totally have another quilt planned out but until I decide if I want to make two almost identical ones (nieces) I won't be posting that. But what do you guys think of the Red, Yellow, and Blue? I really wish I had more of the red fabric with blue strawberries on it. But what is awesome is that if I do decide to purchase more little scraps to get this completed now is the perfect time to buy thanks to that red, white, and blue holiday just happening!
Somehow all my morning disappeared! Ok so maybe the fact I've been staring at fabric for the past 2 hours has something to do with it ... oops! Y'all have a good one!

So I saw this really awesome quilt top on
Hyacinth Quilt Designs blog and I fell in love with the absolute adorableness of it. With the country quilt I've been slowly putting together in my mind recently I have wanted to do a star pattern of some kind (as you saw in
sleepless creativity) but nothing just felt right, nothing seemed to showcase the fabrics well enough as I want each of them to have an individual impact, but that giant pinwheel star totally makes you look at each fabric while still feeling like a whole artistic piece. I mean isn't it just pretty to look at? Of course this got my creative juices flowing and I was on a mission! Out came the trusty graph paper, pens, and highlighters in hopes to come up with general placement of fabric. Knowing that I had 3 fabrics that primarily were each red, blue, and yellow and 4 fabrics that mixed all three colors the coloring in triangles began until I came up with what I believe will be adorably country.

I've not gone so far as to say which individual fabric will go where or anything like that but the math is completely done and general idea has been nailed down. Of course the hardest part will be determining placement but I always like to do that when I have the pieces laid out before me which won't be for at least a few days since massive amounts of cleaning and babysitting will be consuming my weekend ... unless I decide to act on bad thoughts that is.
Tis the season to be busy fa la la la la la la la la. That is right the holiday crafting season is upon us, er well me! After work last night I ran over to UPS to pick up my package of lovely things and upon ripping open the package I got so giddy I damn near peed myself. OK so pretty much anytime I buy fabric I am giddy about it ... only own 2 prints that I am not fond of. So what all do I have in store for me this holiday season, you ask? Well I don't know exactly but I do know two quilts will be made for my nieces ...
 |
Some dusty rose prints for Kara
(it matches the quilt my grandma made that is in her room) |
There are 16 different
bandanna prints that will be the front of the quilt and the brown print on the bottom will be the back of the quilt and hopefully I will have enough to make the binding as well. I'm just going to do a very simple block quilting in pink thread.
 |
Green and blue prints for Lilah
(it matches her new big girl room ...and I wish it was mine) |
Seriously I absolutely adore these fabrics! There are 20 different prints on the front and I will be using the blue flower on the tan background as the back and hopefully the binding as well. Just as with Kara's I will be doing a simple block quilting but in white thread. Both quilts will be great weekend projects once I buy the batting for them. Of course I totally have to decide what else I am going to do this holiday season ... ma, daddy, Crysti, Jamey, Granny Doot, Elizabeth, J&B, and the girls. Plus I know the nieces will not be thrilled about blankets so I will be buying them some plastic something that they will like for a short time before moving on to the next fad ... girls, they are silly things. On top of all of that I also have to take my sewing machine back into the shop to get it all cleaned out and readjusted ... really wish my "all metal" sewing machine was in fact all metal so I could just take it apart myself. Or better yet if my other machine hadn't had it's screws put in so tightly (daddy's Popeye strength) I could take that one apart and do it myself. I digress though.
Now there is always the country quilt I'm planning that could go to someone for the holidays, it would be a nice present though I don't know who would appreciate it and love it with the color scheme other than myself. Ok I take that back I know who exactly would absolutely adore a vintage-y country quilt, in fact those words describe their style perfectly but the colors aren't what I would have chosen for them. But due to coupons and free shipping I had to add $10 to the order of the above fabric and so I of course bought more vintage-y fabric for the country quilt, rounding out the entire design in a way that hopefully now completely flows.

Try not to squeal loudly over the cuteness! I mean seriously doesn't that just look straight from the early 60's? Blue, red, and yellow will end up being the most unexpected color combo that just might work out. Seeing as though my whole everything is based around the concept that red is the devil and blue, yellow, and green are best colors in the world the fact I'm getting super excited over these fabrics is kind of a big deal. Seriously, I hate red.